Create a cart campaign (cart based campaign)
Key features
- Activate offers in the cart when products that meet the campaign criteria are added
- Choose from cart campaign types, such as 3 for 2, percentage, fixed amount, or free shipping
- Build the product selection by category, brand, product, price, or import
- Limit campaigns to specific customers or customer groups
- Prioritise and combine campaigns when products match more than one
Quick guide
- Enter a Campaign title.
- Select a campaign type.
- Set the product selection.
- Configure settings.
- Set the date and time, then click Save Campaign.
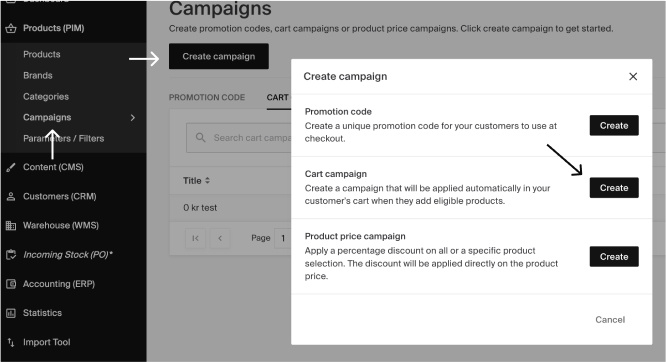
Go to Products (PIM) > Campaigns and click Create Campaign.
Step 1 - Title
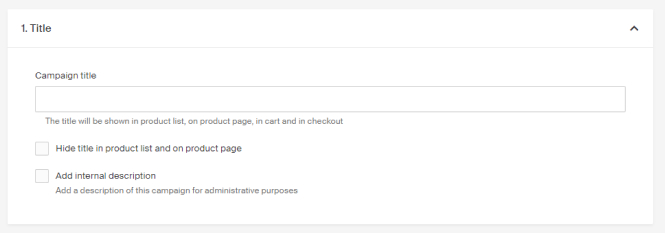
Give the campaign a name in the Campaign title field. The name is shown in the store in product listings, on the product page, in the cart, checkout, and order emails. How the information is displayed depends on how the store is designed and built.
| Option | Description |
|---|---|
| Hide title in product list and on product page | The name will not be shown in listings or on the product page in the store. |
| Add internal description | A short description for the campaign in Merchant Center. For administrative purposes only. |
Step 2 - Type
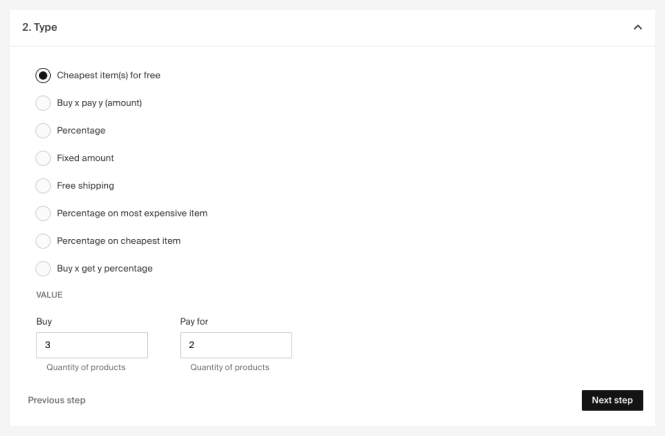
Select the campaign type. These campaigns activate in the cart when products that fulfil the criteria are added.
| Type | Description |
|---|---|
| Cheapest item(s) for free | E.g. 3 for 2, the cheapest item is set to 0. |
| Buy x pay y (amount) | E.g. 5 for 100, the discount is distributed across the products. Supports multiple currencies, see Multilingual and multi-currency support. |
| Percentage | % discount on the entire order, e.g. 20%. Choose to apply the discount on Selling price or Price. |
| Fixed amount | Fixed amount deducted from the order, e.g. 50kr. Supports multiple currencies, see Multilingual and multi-currency support. |
| Free shipping | Free shipping on the order. Also available as an add-on setting with other campaign types. |
| Percentage on most expensive item | % discount on the most expensive item in the order. |
| Percentage on cheapest item | % discount on the cheapest item in the order. |
| Buy x get y % | E.g. buy 5 products in the campaign and receive the set % discount on those products in the cart. |
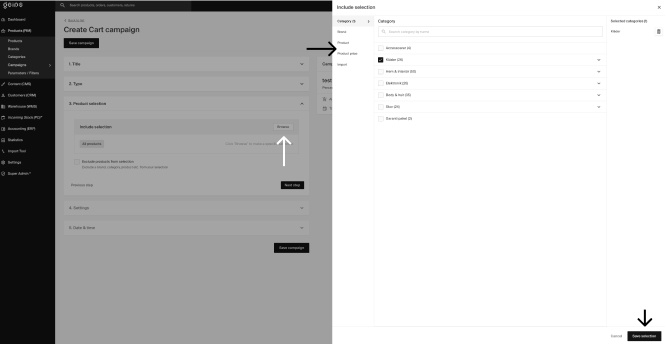
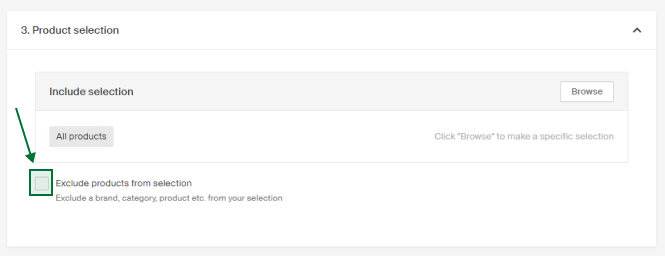
Step 3 - Product selection
Set which products are included in the campaign. Click Browse under Include selection.

| Selection type | Description |
|---|---|
| Category | Include all products in one or more categories. |
| Brand | Include all products from one or more brands. |
| Product | Select products manually from the list. |
| Product price | Include products based on price conditions, e.g. all products over 500kr. Multiple conditions can be combined. |
| Import | Import a product selection from an Excel file. Set the ID type (product ID or article number) and the ID column number. |
Click Save selection when done. You can update the selection at any time.
Exclude products
To exclude specific products from the selection, for example a campaign on all jackets except brand X and Y, click Exclude products from selection and choose which products to exclude (using the same method as the include selection).
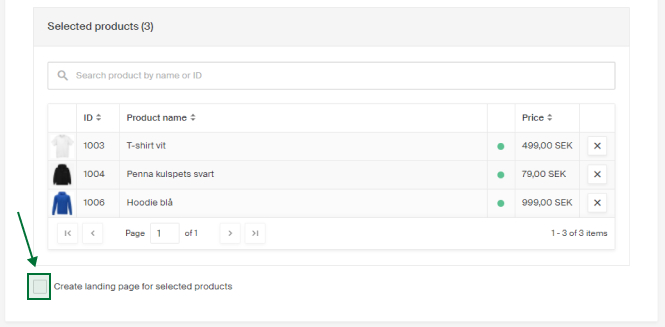
Create a landing page
If you want a page with the campaign's products at a specific URL, click Create landing page for selected products below the selected products list. You can create a separate URL for each market.
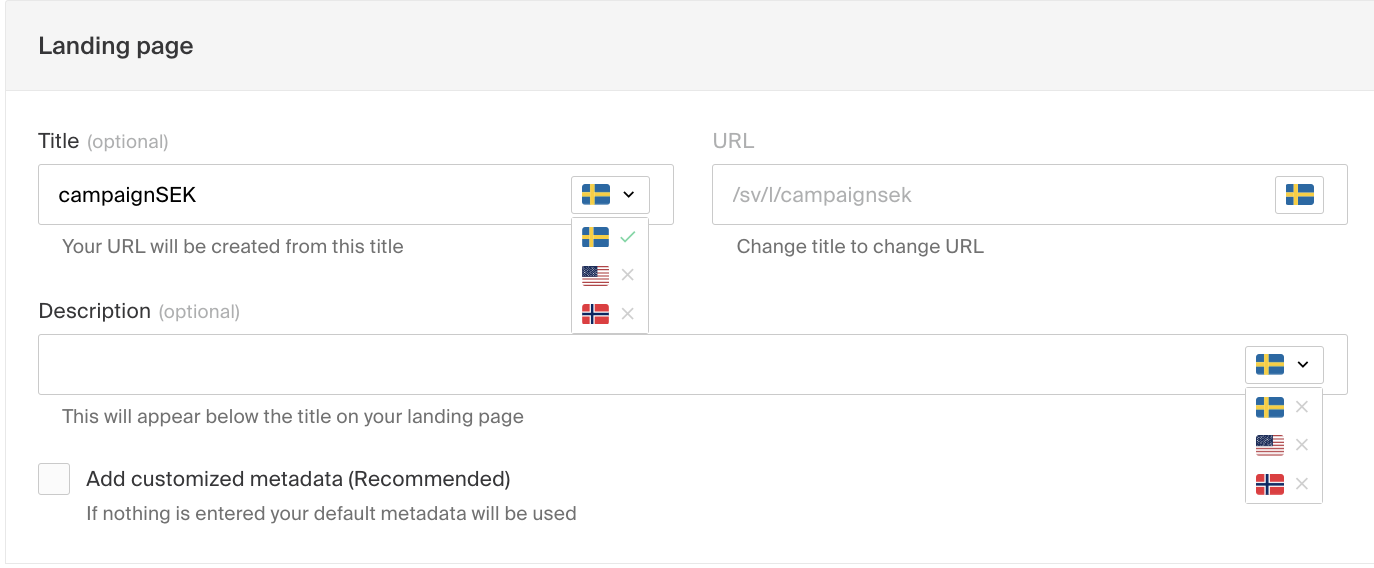
Give the page a title, which forms the URL. You can also add a descriptive text shown under the headline in the store.
To add custom metadata, click Add customized metadata (Recommended) and enter title, keywords, and description. If nothing is added, the store's default metadata is used.
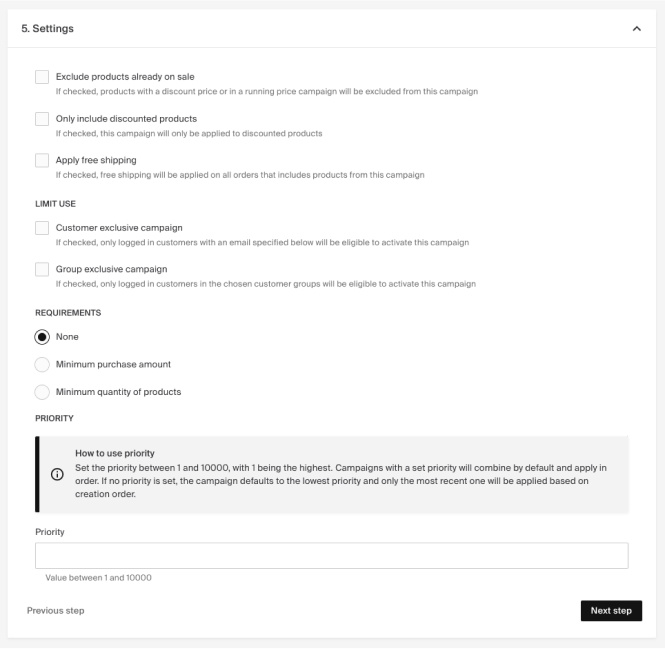
Step 4 - Settings
Available settings depend on the campaign type selected.
| Setting | Description |
|---|---|
| Exclude products already on sale | Products with discount prices are excluded from the campaign. |
| Only include discounted products | Campaign applies only to products with discounted prices (discount price or included in a product price campaign). |
| Apply free shipping | Free shipping is applied to orders that include products in the campaign. |
Only include discounted products has three sub-options:
| Option | Description |
|---|---|
| All discounted products | Applies to all discounted products. |
| Only products with discount price | Applies only to products with a set discount price. |
| Only products with campaign price | Applies only to products included in a product price campaign. |
Limit use
Exclusive campaigns
| Option | Description |
|---|---|
| Customer exclusive campaign | Makes the campaign available to specific customers by email address. Customers must be logged in. |
| Group exclusive campaign | Directs the campaign to specific customer groups created in Customers (CRM). Customers must be logged in. |
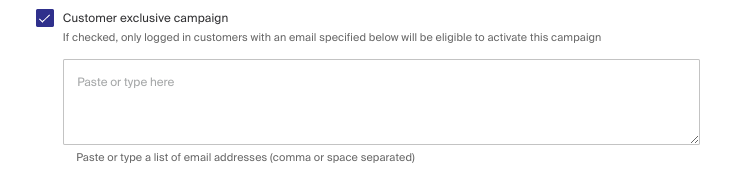
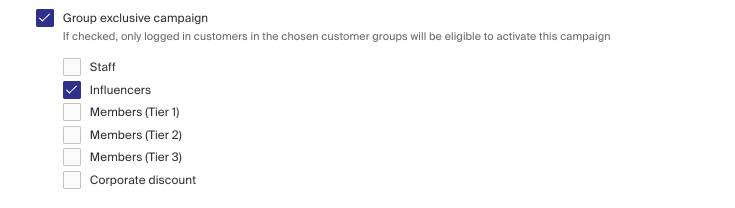
To find out how to create customer groups click here. To find out how to add customers to a customer group click here.
Requirements
| Setting | Description |
|---|---|
| Minimum purchase amount | The total cart amount (excl. shipping) required for the campaign to apply. |
| Base amount on | Whether the required amount is calculated before or after other discounts and campaigns are applied. |
| Calculate from (amount) | Whether the amount is calculated on the entire cart or only on products in the campaign's product selection. |
| Minimum quantity of products | The minimum number of products required in the cart for the campaign to apply. |
| Calculate from (quantity) | Whether the quantity is calculated on the entire cart or only on products in the campaign's product selection. |
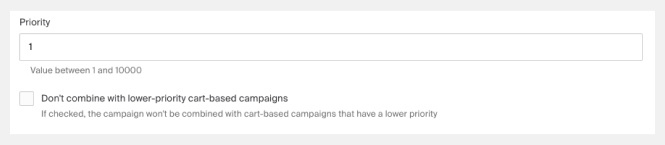
Priority
Cart-based campaigns can be prioritised and combined when products match more than one campaign.
| Setting | Description |
|---|---|
| Priority level | Value between 1 and 10000. Priority is descending, so 1 has the highest priority and is applied first. |
| Combining campaigns | Campaigns with a set priority are combined by default, applied in priority order. |
| Do not combine with lower-priority campaigns | Prevents lower-priority campaigns from applying to products already discounted by a higher-priority cart campaign. |
| Equal priorities | If multiple campaigns share the same priority and match the same products, the most recently created one is applied. |
| No priority set | Defaults to the same lowest value. Only the most recently created campaign is applied. |
Read more about campaign types and priorities:
Step 5 - Date & time
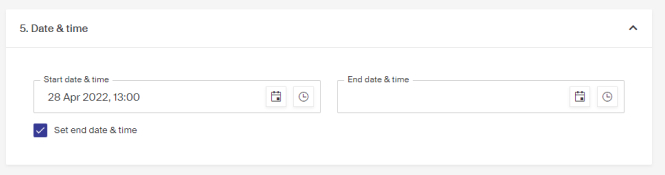
Set when the campaign will be active. Enter the date and time you want the campaign to go live.
To add an end date, enable Set end date & time and choose the date and time.
Click Save Campaign when done.