Create a Product price campaign (price campaign)
Key features
- Give included products a reduced price, shown directly in the store as a sale price
- Set one discount percentage for the whole campaign, or specific prices and percentages per product
- Apply the discount to the product's ordinary price or sale price
- Build the product selection by category, brand, product, price, or import
- Optionally create a landing page for the campaign's products
Quick guide
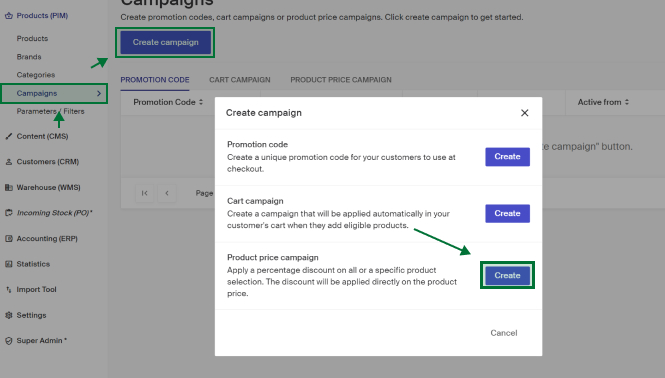
- Go to Products (PIM) > Campaigns and click Create Campaign.
- Enter a Campaign title and set the discount.
- Set the product selection.
- Set the date and time, then click Save Campaign.
A product price campaign reduces the price of the included products, shown directly in the store as a sale price.
Go to Products (PIM) > Campaigns and click Create Campaign.
Step 1 - Settings
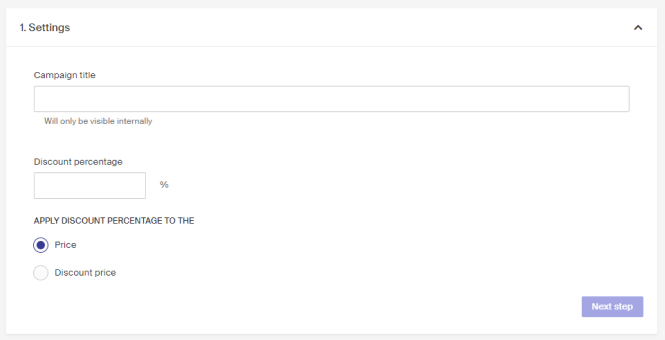
| Field | Description |
|---|---|
| Campaign title | The campaign name. Used internally and shown in campaign listings in Merchant Center. |
| Discount percentage | The discount percentage for the campaign. |
| Apply discount percentage to | Whether the discount is taken from the product's ordinary price or its sale price, if one is set. |
Step 2 - Product selection
Set which parts of the assortment are included in the campaign. Click Browse under Include selection.
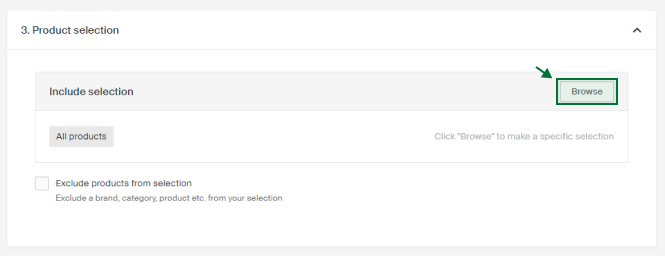
| Selection type | Description |
|---|---|
| Category | Include all products in one or more categories. |
| Brand | Include all products from one or more brands. |
| Product | Select products manually from the list. |
| Product price | Include products based on price conditions, for example all products over 500kr. Multiple conditions can be combined. |
| Import | Import a product selection from an Excel file. |
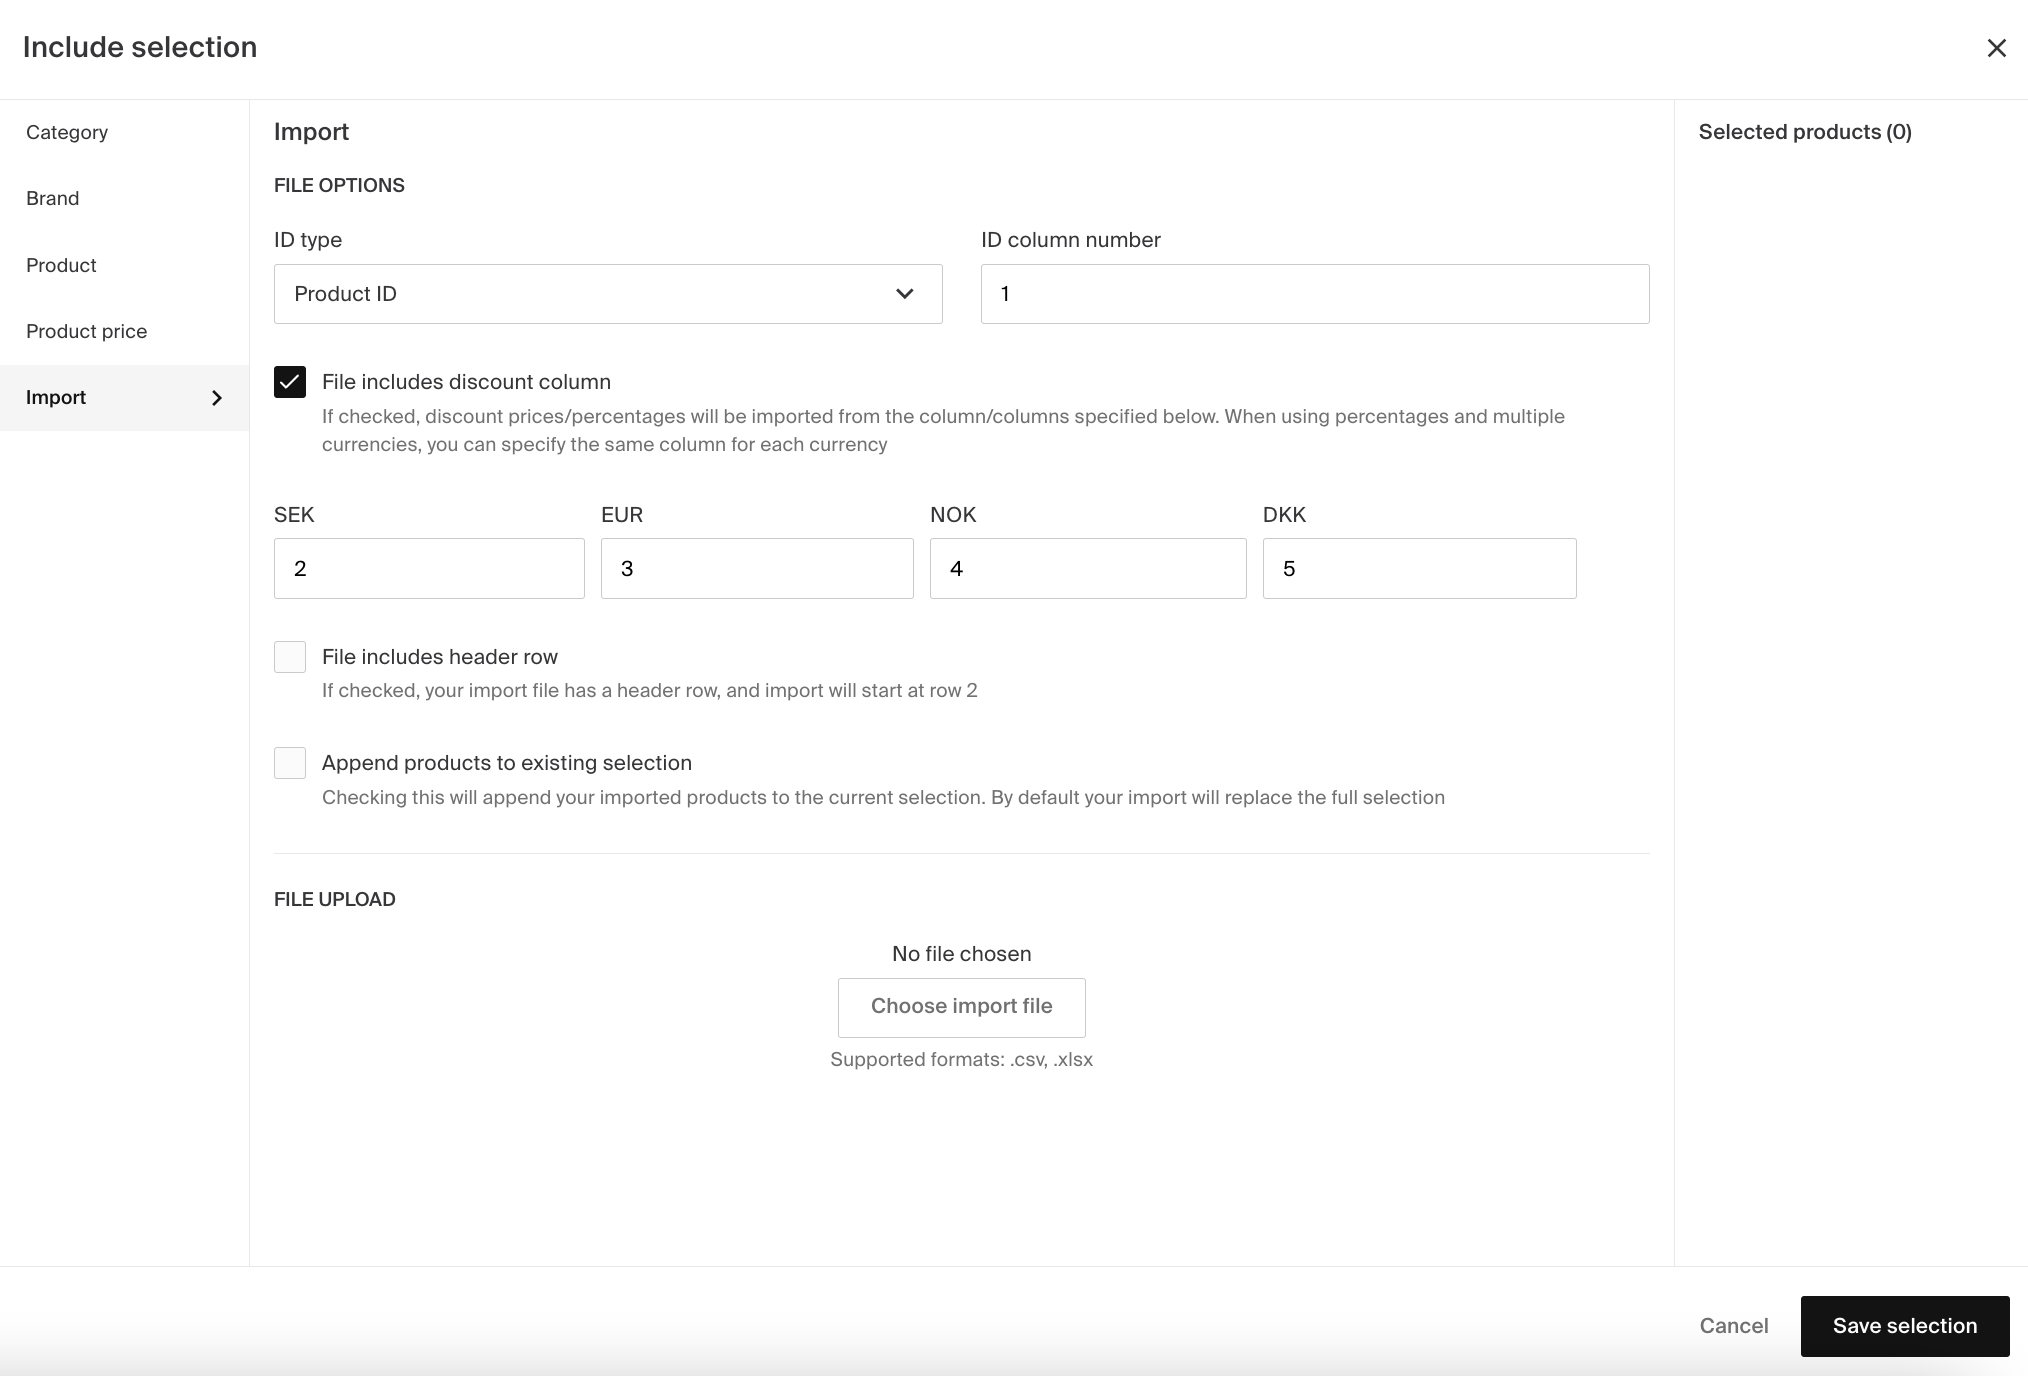
For Import, set the following file options:
| Option | Description |
|---|---|
| ID type | Whether the file identifies products by product ID (Merchant Center) or article number. |
| ID column number | Which column the ID or article number is in. |
| File includes discount column | Discount prices or percentages are imported from the specified column(s). With percentages and multiple currencies, you can specify the same column for each currency. |
| File includes header row | The file has a header row, so import starts at row 2. |
| Append products to existing selection | Appends imported products to the current selection. By default, the import replaces the full selection. |
The article import reads in products to a selection. To create new products via import, use the import tool. See Working with article import for more detail.
Click Save selection when done. You can update the selection at any time.
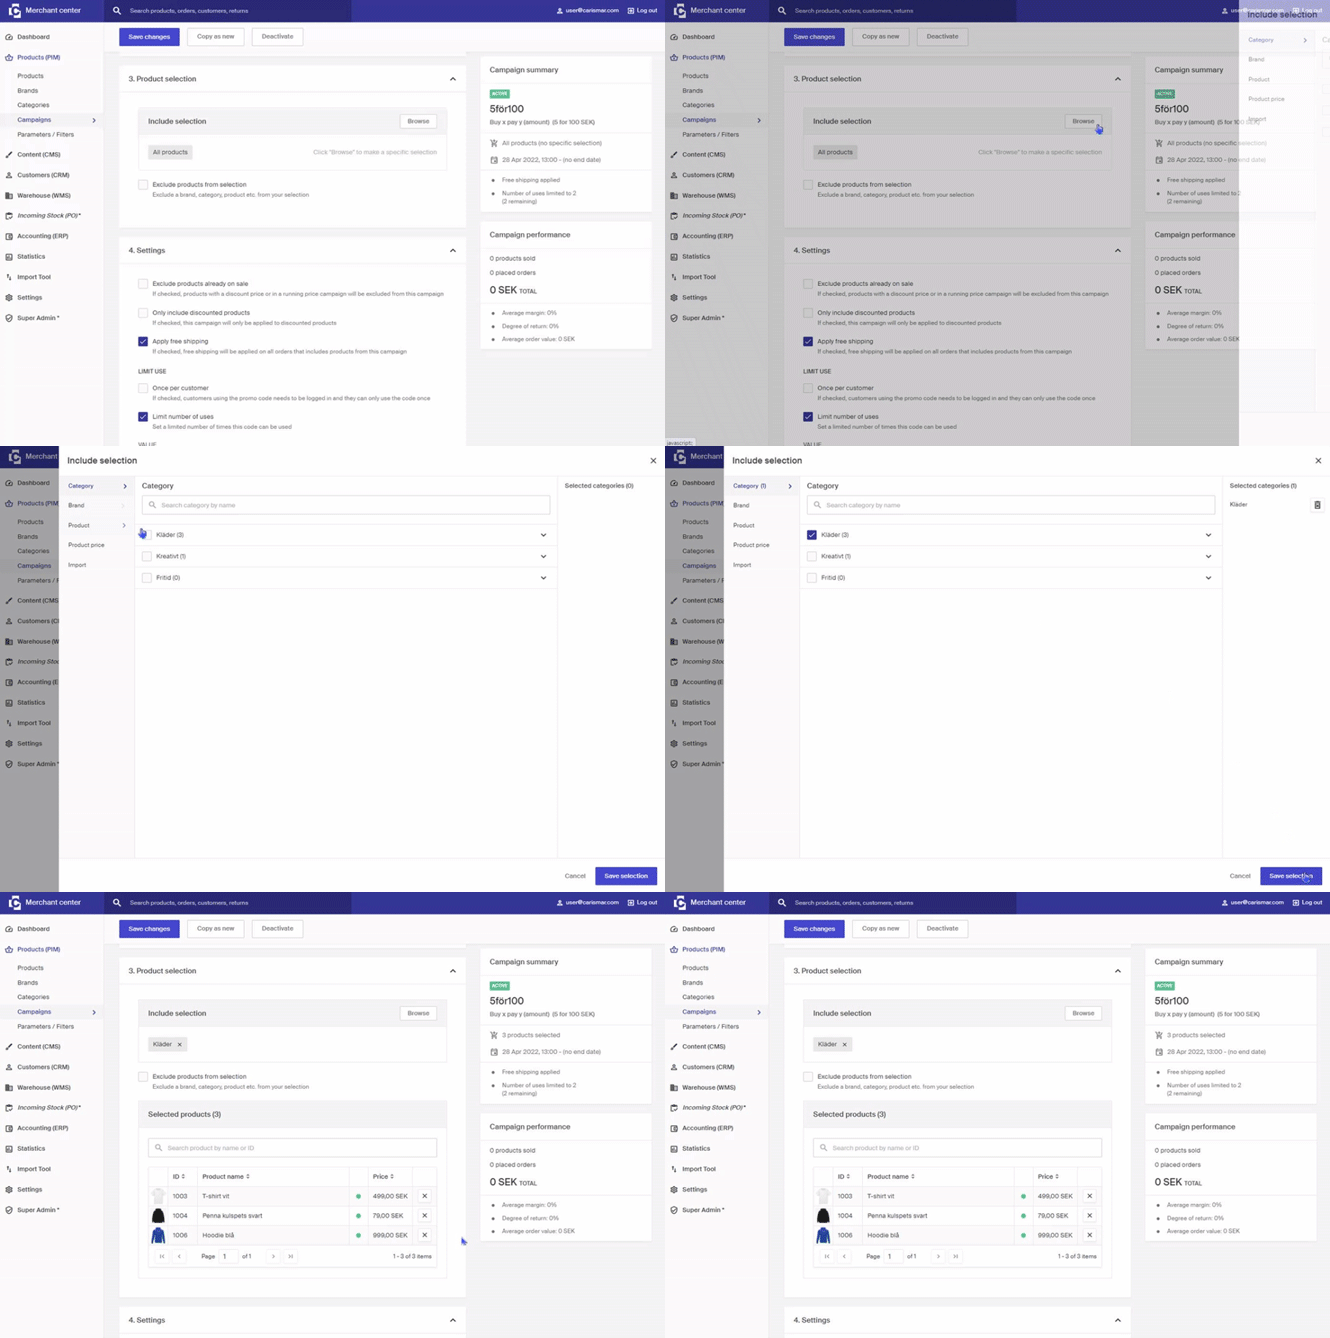
Edit price on individual rows
You can set specific percentages or campaign prices on individual products directly in the product selection list, in the Discount (%) or Campaign price columns.

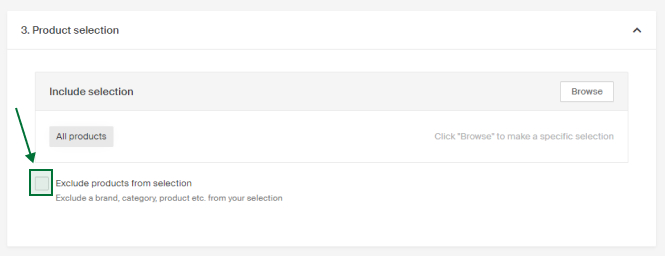
Exclude products
To exclude specific products from the selection, for example a campaign on all jackets except brand X and Y, click Exclude products from selection and choose which products to exclude (using the same method as the include selection).
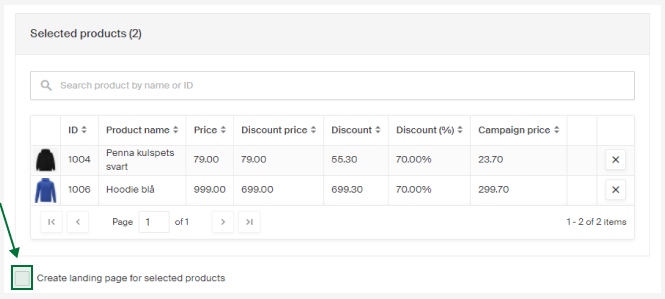
Create a landing page
If you want a page with the campaign's products at a specific URL, click Create landing page for selected products below the selected products list.
Give the page a title, which forms the URL. You can also add a descriptive text shown under the headline in the store.
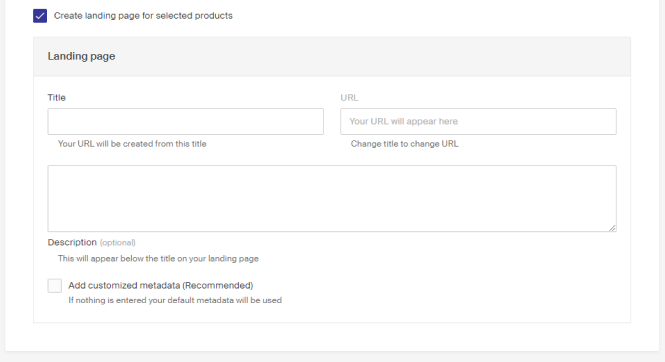
To add custom metadata, click Add customized metadata (Recommended) and enter title, keywords, and description. If nothing is added, the store's default metadata is used.
Step 3 - Date & time
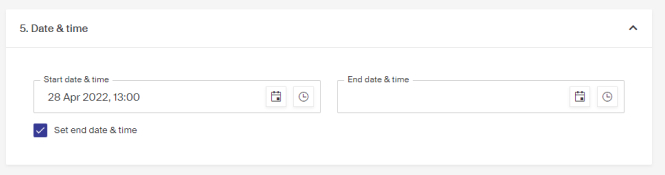
Set when the campaign will be active. Enter the date and time you want the campaign to go live.
To add an end date, enable Set end date & time and choose the date and time.
Click Save Campaign when done.