Create and edit a menu with the menu editor
Key features
- Create and edit menus for various storefront locations
- Add categories, brands, pages, or custom links
- Import the whole category tree from Products (PIM)
- Assign the menu to a location, channel, and language
Quick guide
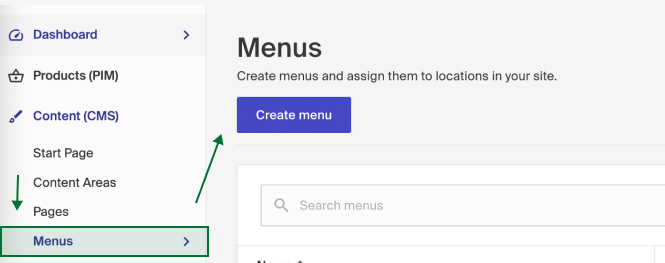
- Go to Content (CMS) > Menus and click Create Menu.
- Name the menu.
- Add menu items (categories, brands, pages, or custom links).
- Choose the location, channel, and language.
- Click Save.
The following example creates a main menu.
Go to Content (CMS) > Menus and click Create Menu.
Name your menu, for example Main Menu.

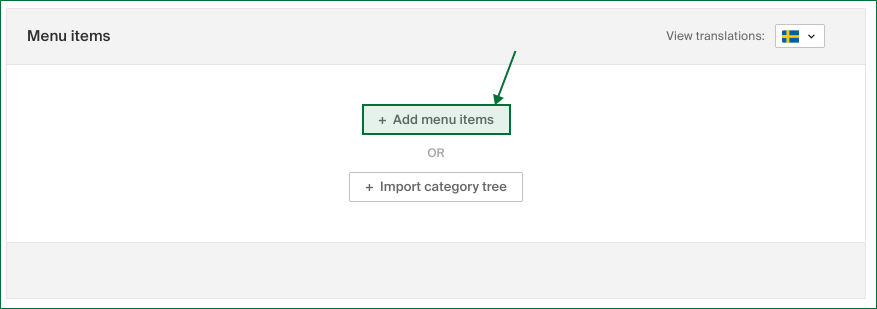
Add Categories, Brands, Pages (created as stand-alone pages in the CMS), or a Custom link by clicking Add menu items.
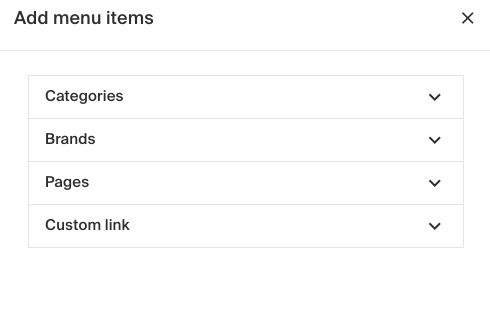
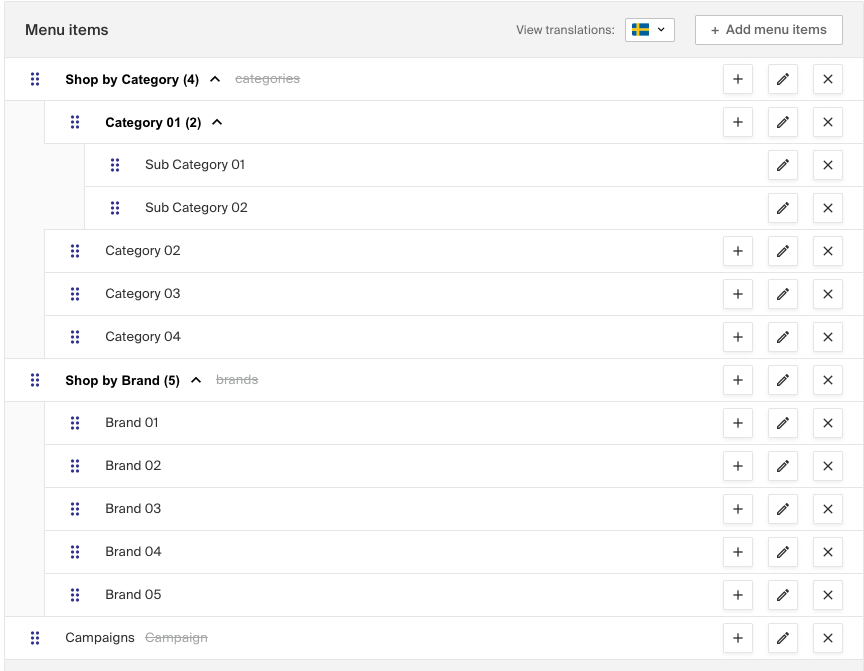
You can also import the whole category tree created in Products (PIM) > Categories, which gives you the existing structure directly. You can rename the categories and drag and drop them into a different structure.
Renaming and dragging categories does not change the breadcrumb or the category structure created in Products (PIM) > Categories.
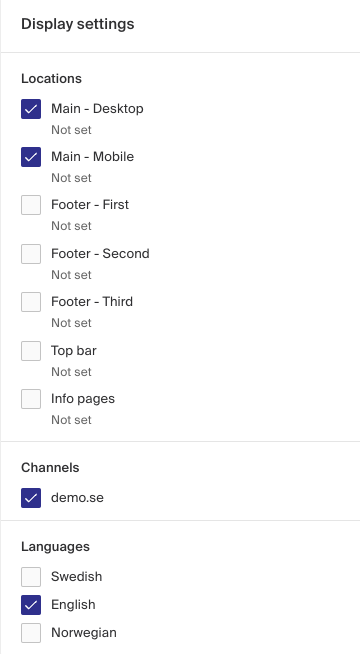
Next, decide where the menu is placed in your storefront. The available locations are set by your page design and configuration. Base locations are Main - Desktop, Main - Mobile, Footer - First, Footer - Second, Footer - Third, Top bar, and Info pages. You can use the same menu in all locations, though it is not recommended.
Last, decide which channel and language the menu belongs to.
Click Save and your menu is published in your store.