Create Content
Create a content page with included menu
When creating a stand-alone page, you can choose whether it includes a menu.
Key features
- Add a menu to a stand-alone content page
- Two steps: tag the page with menu, then link it in the menu editor
Quick guide
- In Content (CMS) > Pages, add or open a page, add the tag menu, and save.
- In Content (CMS) > Menus, create or edit a menu on the info pages location and add the page links.
When creating a stand-alone page, you can choose whether it contains a menu.
Example of a menu applied on a page in a storefront:
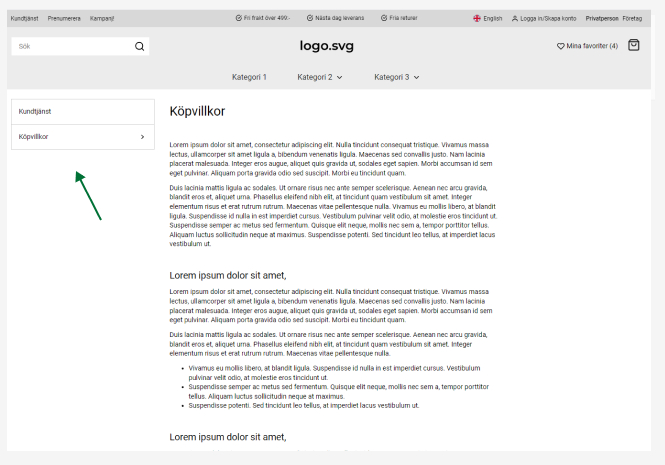
To include a menu on a content page, two steps are needed: add a page that contains a menu, then link the page in the menu editor.
Add a menu space on a content page
- Go to Content (CMS) > Pages and open an existing page or click Create new page.
- To set up a page that includes a menu space, enter the tag menu in the Tags field.
- Save the page.
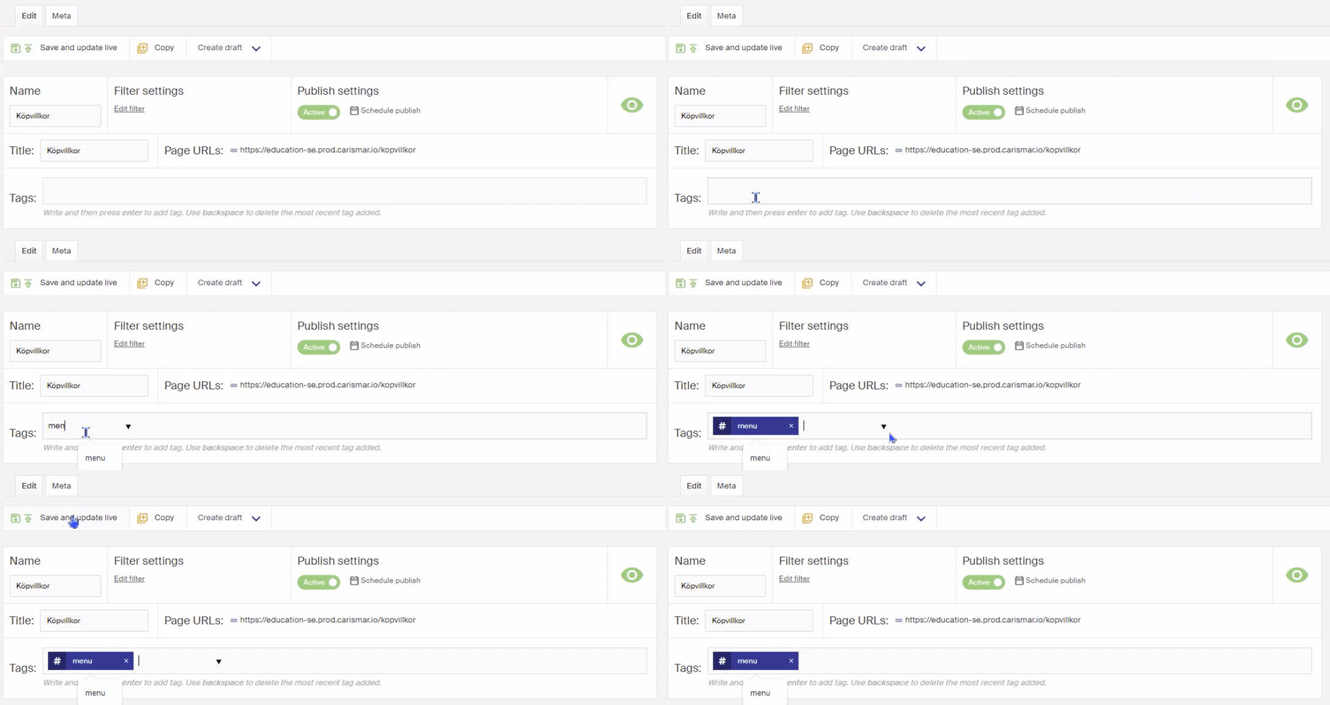
The page now supports showing a menu. The next step is to link the page in the menu editor (and create the menu if it's the first time).
Create a menu and add links with the menu editor
- Go to Content (CMS) > Menus and click Create menu. If you have already created the menu on the info pages location, open it and add a link to the page instead.
- Give the menu a name.
- Choose which channels it is shown on.
- Under locations, select info pages. The menu location must be configured.
- Add the links by clicking Add menu items, then under pages add the content pages to show in the menu.
- Click Save menu.
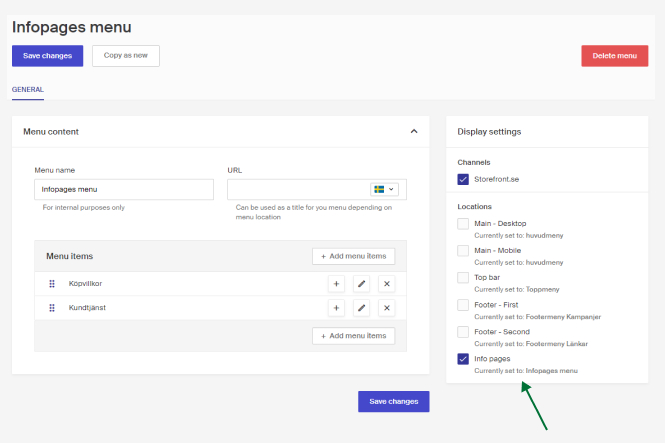
The menu now appears on content pages that have the menu tag, and shows the links added in the menu.