How the import tool works
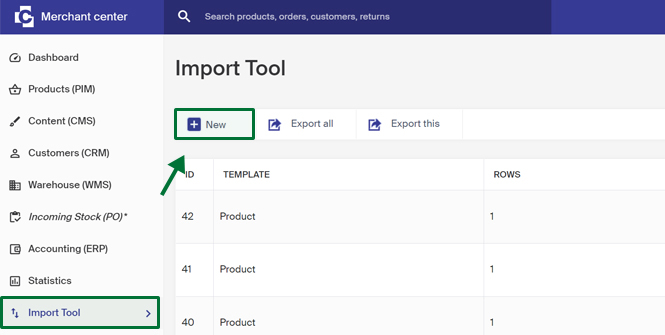
Click on Import tool in the menu, then click on New to create a new import. If you first want to take an import template to work on, then you do it in the next step.
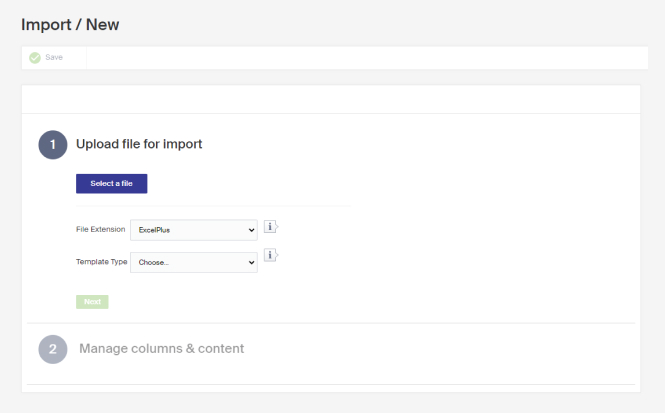
In the next step you upload the file you want to import. Here you will also find the different available import templates.
Download an import template
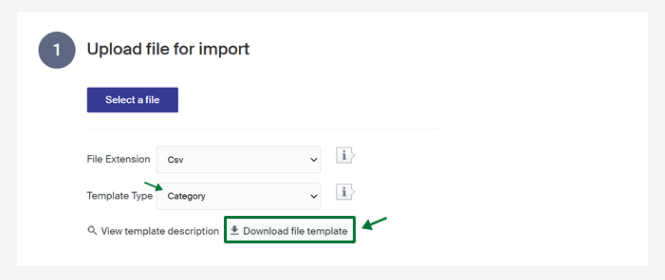
To download an import template, you first need to choose the type of import you want to make. To do this choose it in the Template type drop down. Read separate articles for a thorough description of the different import templates. The import templates that are available are:
| Column | Description |
|---|---|
| Category | Category import. Create new categories or update existing categories. |
| Customer / member (Beta) | Customer import. Update data on existing customers in the system. Placing in a customer in customer group for example. Can also be used to create new customers. |
| Google Product Taxonomy | Map existing categories against the google taxonomy categories that exist. |
| Price list | Price list. Read in a price list with product prices for specific customer groups. Makes it possible to work with quantity discount prices. Requires that customer groups are in the system. |
| Product | Product import. Create or update existing products. |
| Product Images | Product images. Import template for importing product pictures to existing products. Requires that the pictures that are going to be imported are uploaded somewhere and are available via a URL. |
| Product parameters | Product parameters. Enrich existing products with parameter values and attributes from existing parameter groups. |
| Purchase | Purchase template. Create purchase orders via the import tool with this template. |
| URL history | Management of reassignment of old URLs. Used primarily with change from another platform to Carismar. |
When you have chosen in the template type drop down, click on Download file template.
The file is downloaded and can be completed for import. It also works to work on a file that isn’t based on any of the existing import templates. Then you map your columns to the right ones.Mapping of columns come in the next step.
Uploading the file When you have your file ready, click on select file and choose the file you want to import. Set the type of file that gets uploaded by choosing filetype in the drop-down* File Extension,*also choose what type of import to make in the template type drop down, click on next
| Column | Description |
|---|---|
| ExcelPlus | Files of filetype .xlsx |
| Excel | Files of filetype .xls |
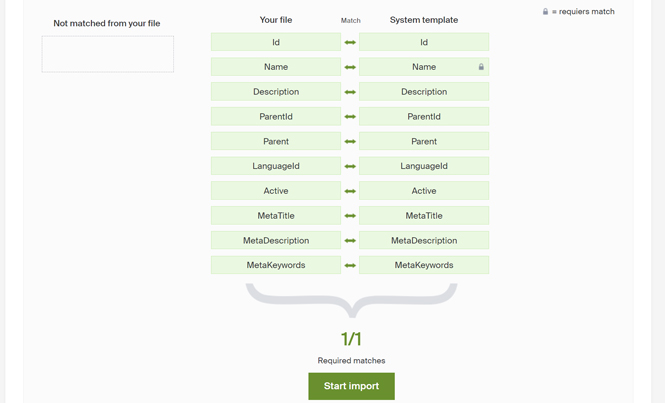
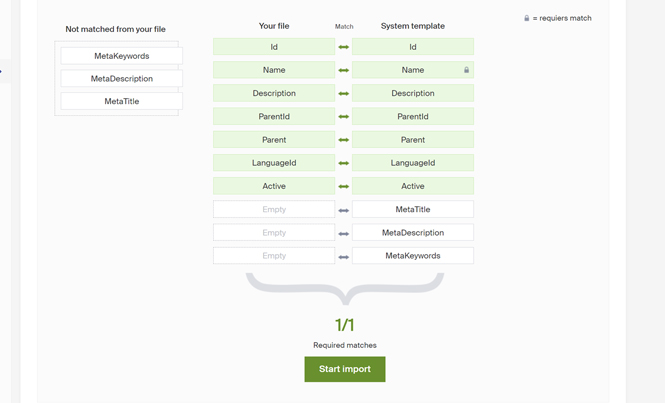
| Csv | Files of filetype .csv #### Mapping field In the next step you map the field in your file against the system. Fields with padlock icons that require a match are mandatory and need to be matched for the import to work. If you use one of the import templates, then all fields will be matched automatically. Below is an example shown of a category import with the import template where all fields have been matched. |
If you want some fields not to be included in the import you will need to remove them. The picture below shows an import with the import template where the option to not include fields for metaTitle, MetaDescription and MetaKeywords has been chosen.
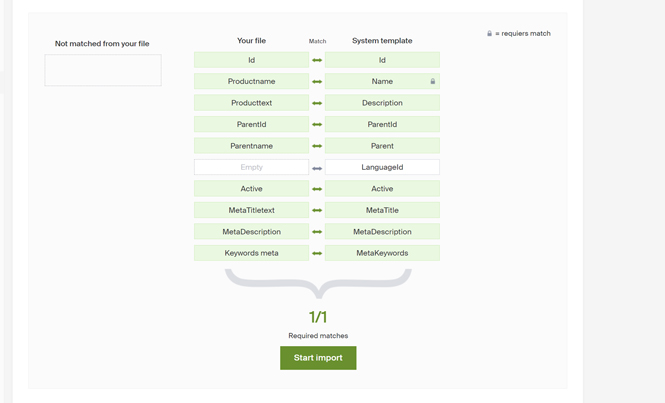
To take away fields you use drag-and-drop to drag the field that is under your file and drop it in the box that's under Not matched from your file
If you work with a file that isn't based on an existing import template, then the columns can be differently named and then you need to match them yourself (see example picture below).
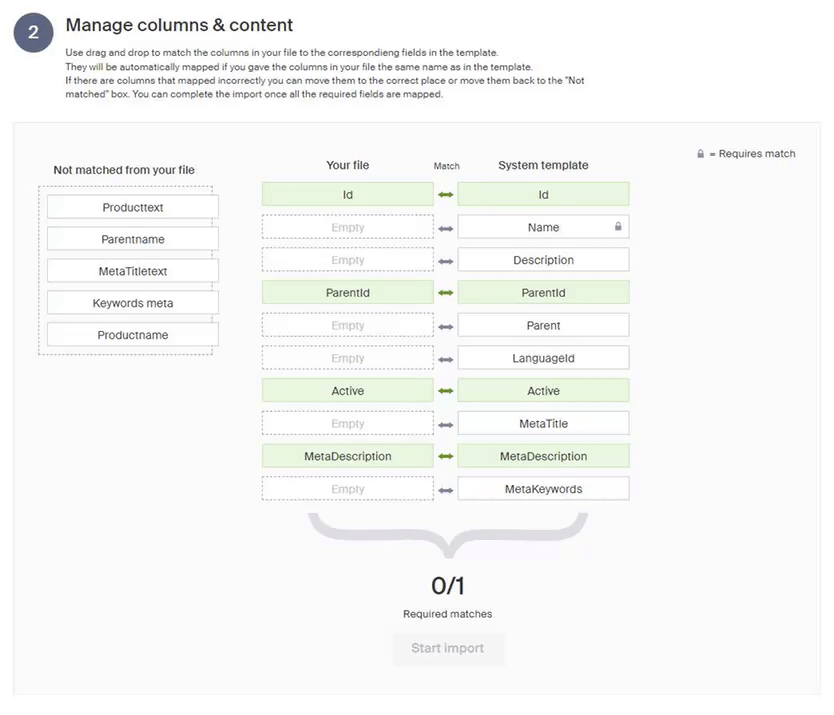
This is done through using drag-and-drop and dragging the different names that are in Not matched from your file to the place beside the field that you want to match with.
After you have matched the fields you want in the import (All required fields must be matched) then you can click on Start Import to start importing.
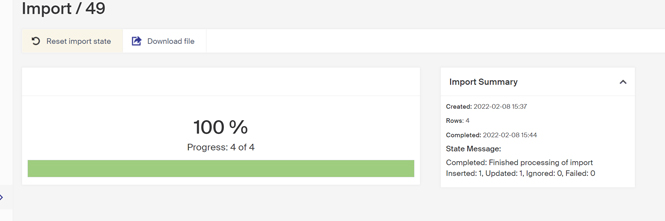
The import is complete when it says 100%. In the column to the right is a summary of the import.
Create or update categories via import tool
- If you have a file ready, click on **Select file** directly and choose which file you want to import. Set which type of file that shall be uploaded by choosing file type in the drop down * File Extension,*choose template type * Category*and click on **Next**. ( go directly to the next step in this guide, [here](https://carismar.zendesk.com/hc/en-us/articles/6445889048466-Create-or-update-categories-via-import-tool-#mactha)).
How to add a new product with multiple sizes via the import tool
Creating a new product with the import tool can be done in two ways.